

On to reviewing this mean looking, uniquely
designed Gunpla; this is one of many reviews I'll be doing exclusively for
Gundam Planet. If you don’t know already, Gundam Planet is my main sponsor and
they kindly provided me with this kit to test out its "limits" build
wise. Now I'll be honest, this is the
first Gunpla I built from the Turn A line; I have yet to build the MG Turn A or
its HG counterparts; but through the wide reach that is the internetz, I have
heard some positive reviews over it.
 |
| Uniqueness is Key |
So as per build routine regardless of what
the manual says, I always build the head unit first. First thing that you'll
notice is that the head unit is also the cockpit; not your average MS where the
cockpit is usually located in the chest area; this location is very similar to
Sazabi; very cool design IMO and has numerous parts to compose this
amazingly shaped head. The top part of the head unit does open, revealing its
pilot; the camera eye is your standard clear part where the foil sticker will
be placed; this kit gives you two foil sticker options, one that shows that
eyes itself and another one just pure black with no eyes; so far so good.
 |
| A very well rounded MS Indeed |
The next unit is the torso unit; one thing
I noticed whilst building the frame is that this kit is very well rounded; I
mean the entirety of the torso unit base frame is composed mostly of multiple
hollow "pipes"; again, not your average humanoid shaped torso which
makes this kit very unique and very interesting. It has your standard
articulation where you can position the torso either facing up or facing down
and side to side; you can lock it in a fixed position by attaching the back
pack mount. As you can see the back is quite detailed which is a plus on this
kit. Building the torso unit also requires you to build the shoulder frame;
this is again very unique and conforms to the kit's rounded design; it is also
very articulate too as you would expect on a MG kit. Following the frame, you
will then have to attach the armour, and the first thing I noticed is that none
of the parts are symmetrical. Before the
main armour is attached; you have to first install the "Scar" foil
sticker effect to the frame, very easy and it's almost impossible to make a
mistake; once the stickers are installed; a sizeable clear part goes over it
thus giving you a very cool effect when shined with light at varying angles. Following
this, the armour can be easily installed.
 |
| Rounded fit for the torso unit |
The next unit is the waist unit; you are
served with quite a few parts to assemble it; the bottom part of the unit is
pretty standard since legs will have to go with it; the top half however is
again a rounded part since this is the main attachment for the torso unit;
articulation is very good and I particularly like the front skirts and the
amount of detail that goes along with it.
 |
| Oversized Shoulder "Shields" |
On to the arms – building the arms gave me
a new familiarity and completely threw me off on my normal build routine. When
it comes to the arms and legs on any given kit, I always build them together,
this way I learn the build mechanics in one go and also saves time. Looking at the instruction on this kit, it
would not have been possible as the whole design is not symmetrical; the design
was the same on the upper arms but the forearms are completely dissimilar. So I decided to build the upper arms first; there
are no armour attachments for the upper arms; instead, the armour is located to
cover the shoulder joint thus acting as the main attachment for the shoulder
armour and towards the torso unit. The main reason why there are no amor pieces on
the upper arms is mainly because of that colossal shoulder attachment; I call
them shoulder shields since they might as well be due to its size; because this
is large part, I never expected it to be so detailed and I can say this is by
far the most detailed armour pieces on the kit. It has your basic frame and a
heat sink to go with it too which is very unique. It is also very articulate
which you can position at your own expense.
 |
| A more standardised forearm |
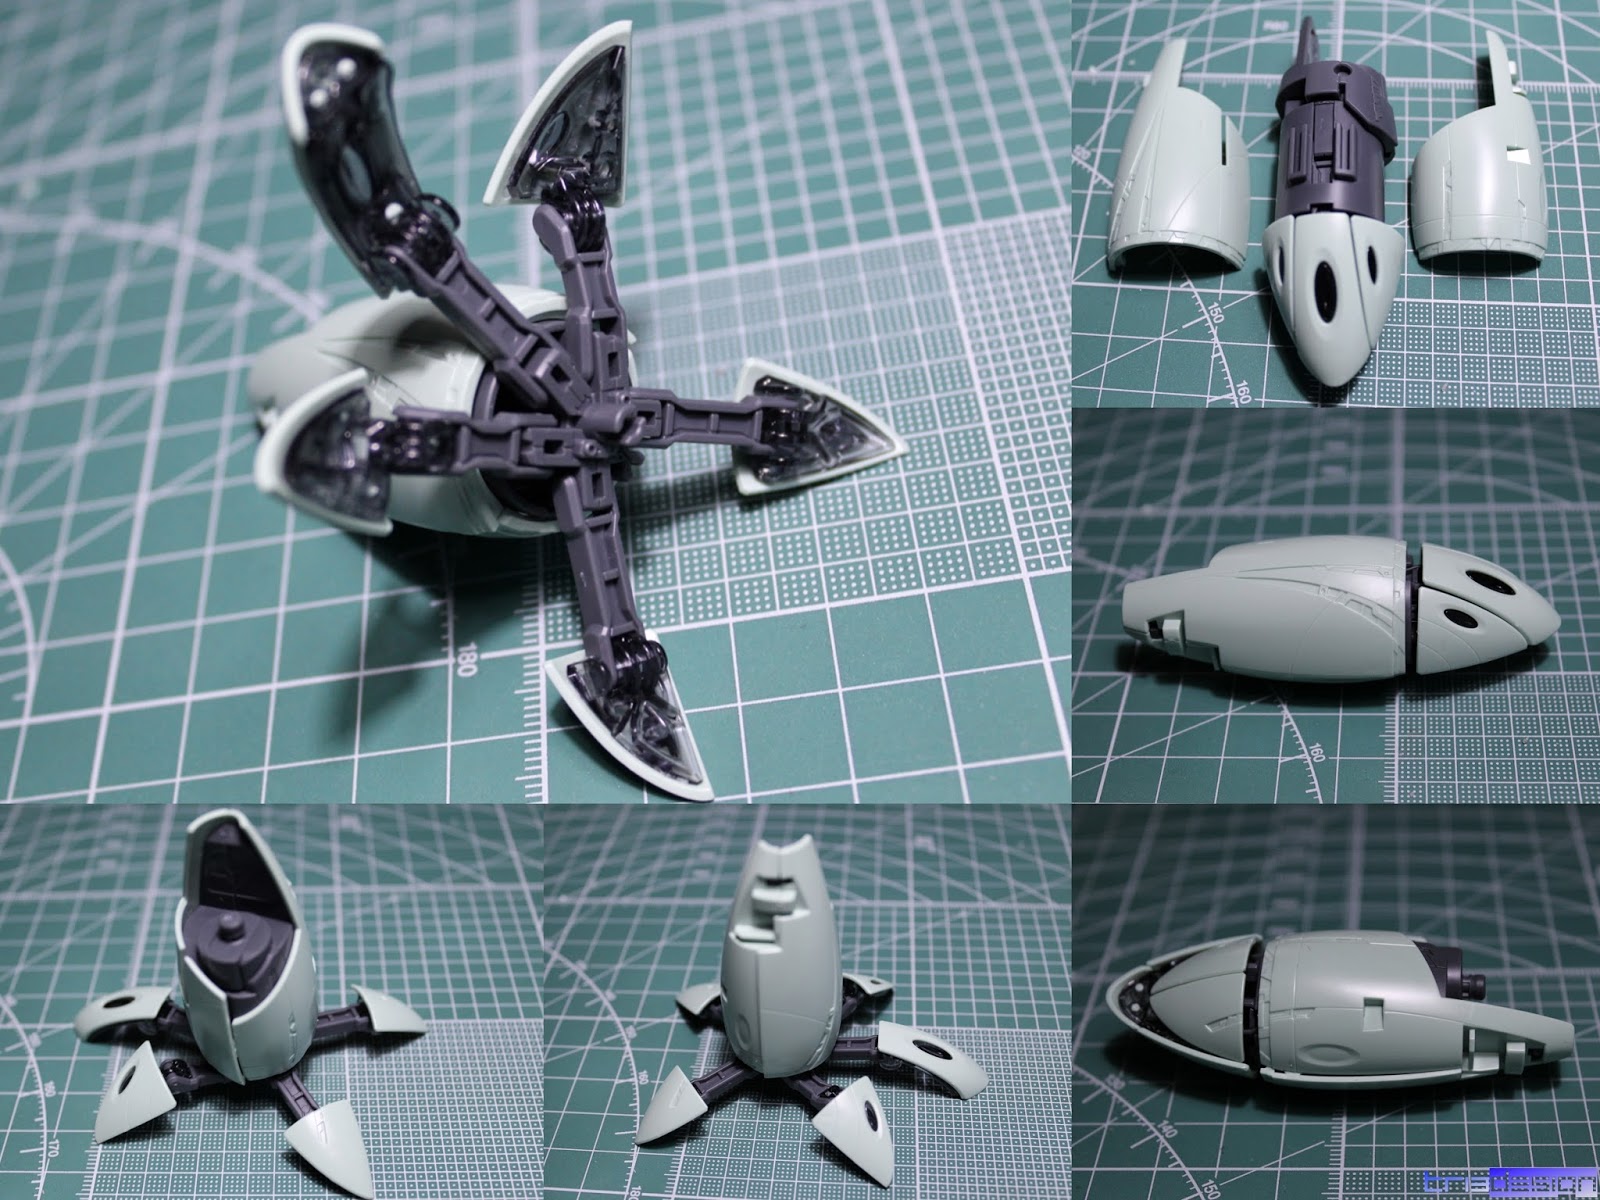 |
| Shining Finger |
As mentioned earlier, the forearms are
dissimilar; so I went ahead and assembled the “Shining Finger” Weapon Arm;
there are a few parts since this is where the kit is mainly drawn to; the sort
of main attraction if you like for this MS design; I was amazed as to how
ingenious it was; first you build the frame of course which is primarily hollow
to accommodate the claws when you holster them; the claws itself are cleverly
designed, again not symmetrical. If you look at it closely, the claws have a 2
point articulation and can move freely once they are deployed; another gimmick
that has made me that much more in love with this kit. Assembling the left arm
brings you back to the idea that yes, this is actually a Gundam; it has your
normal swappable manipulators, the same one’s you get from the Wing kits except
these have their own detailing to it. The left arm also has a noticeable clear
part which gives It a massive contrast from its right counterpart. With both
having numerous parts to assemble, it was fairly easy to snap fit together which is always a bonus.
Moving onto the legs; the first thing that
you will need to assemble is the feet; well you can call it a feet but they
look more like hooves to me but for normality, we’ll call it feet. These are
very sizeable yet very very stable, quite right since looking at the kit itself
and that backpack, the most important feature has to be stability otherwise it
will not be able to stand. Whilst the frame is built the same way, the design
of the armour is again asymmetrical; the next part are the lower leg where the
asymmetrical design is very prominent; the calf armour are quite large and the
way it overlaps with other armour parts is a genius in design IMO; such a
stunning thing to look at. By assembling the legs, this kit grew on me even
more; and this trend continues onto the upper leg areas as well. Whilst the
upper right leg has an overlapping armour design, the left leg has a clear part,
which again makes a really good contrast when you pit them side-by-side.
 |
| Sexy Legs |
The final process is the back pack and the
weapons; again, the size of the back pack is not your conventional back pack;
just one part alone dominates the whole design. With a substantial amount of
part to finally piece them together, it is a joy to build indeed. It has you
combining normal frame parts, armour and clear parts to finish the detailing.
One would think that because of the size, details should be lacking but no,
this backpack is very detailed and is one of the best features on this kit. The
connector itself lets you move the back pack up and down; since it isn’t close
to the torso unit, you can move it freely without any hindrance.
 |
| Leg Details |
The weapons are pretty straight forward;
but one of the tasking feature on any gunpla weapon assembly are the seam
lines, as a modeler, I always have to plan carefully to address the seam lines
and seal them when appropriate. This kit however, the seam lines are actually
part of the design which is a plus for any modeler hoping to custom this
amazing kit. This gives you 4 projectile weapons, a rocket pod, a bazooka type,
a beam rifle and a handgun; not sure why it has weapons in the first place
since the Gundam in itself is already a powerful weapon.
 |
| Quite sizeable |
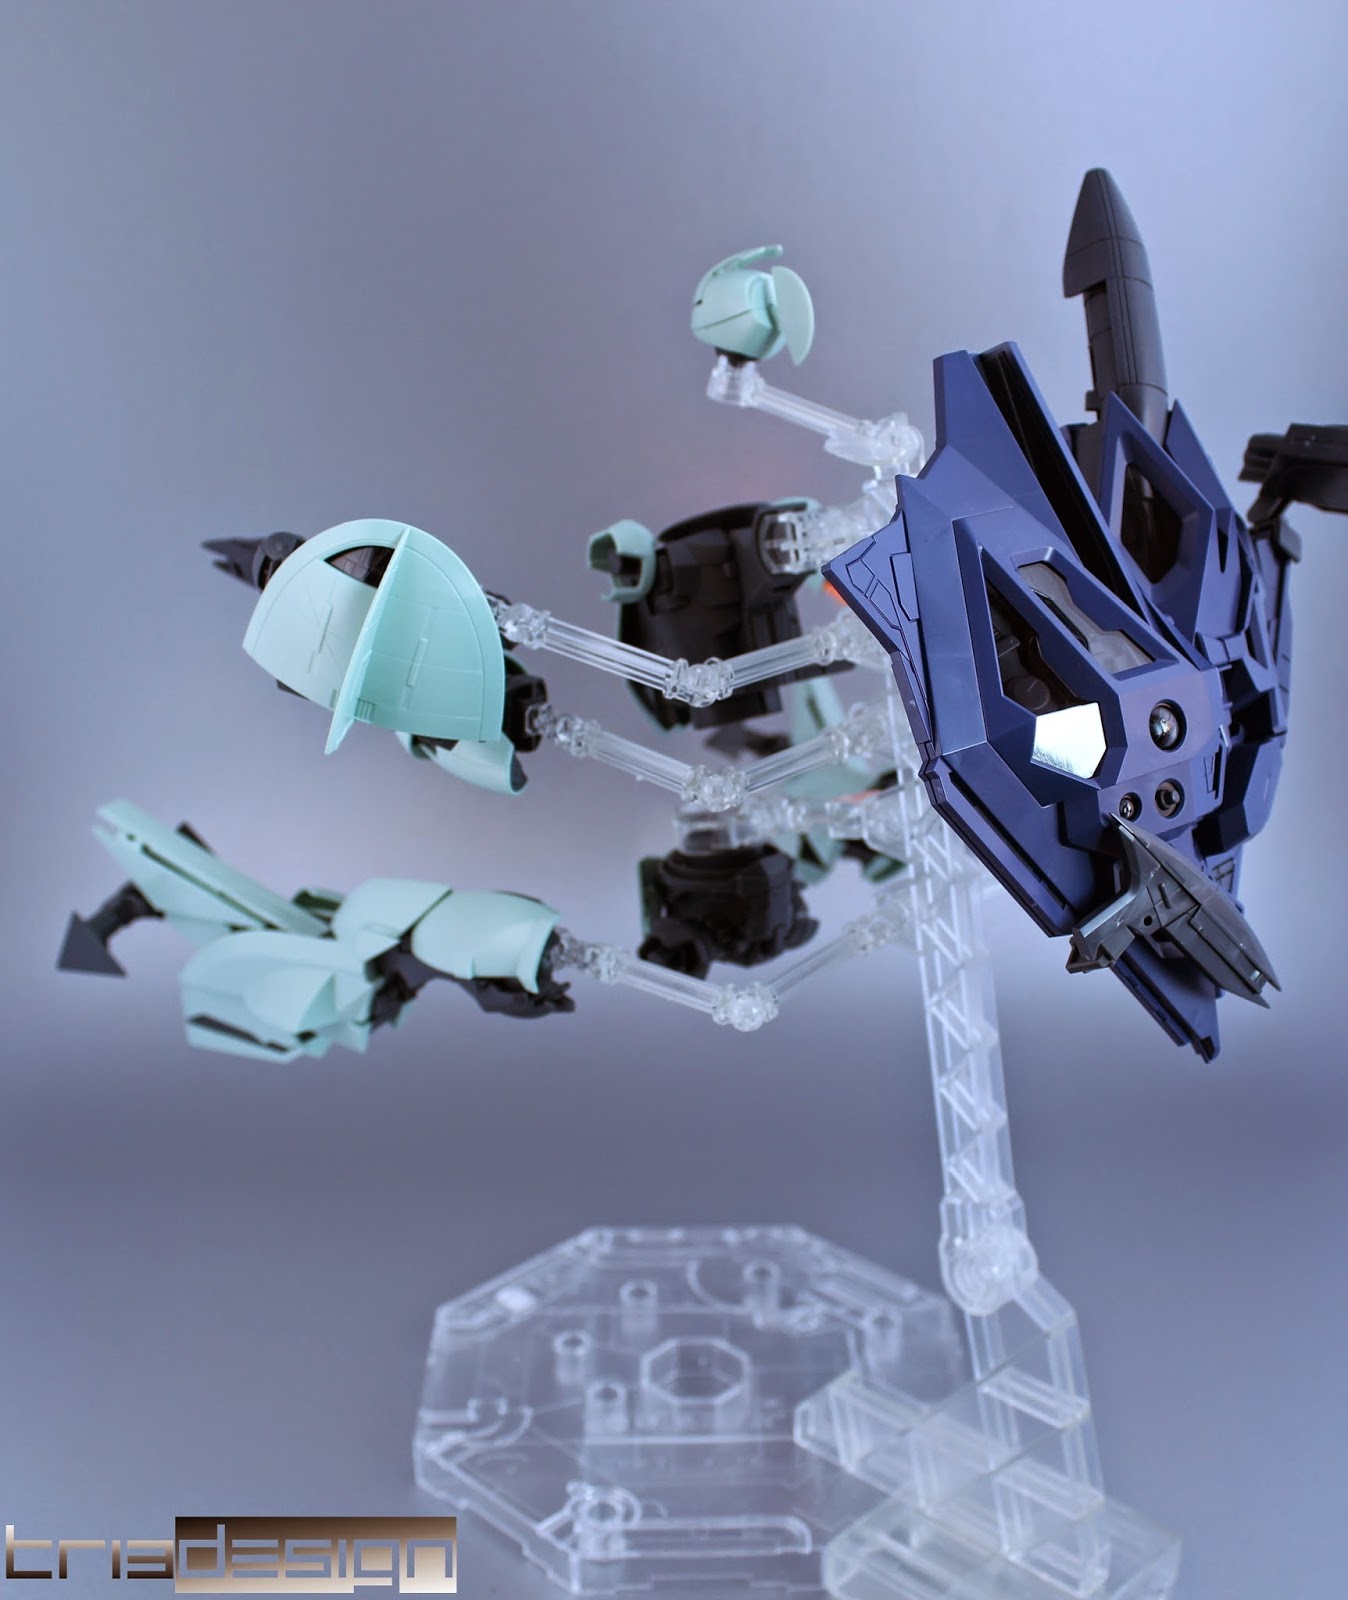
With that, the assembly is complete; Only
when you have assembled all the parts and you initially combine them together
will you see the sheer size of this kit; it is both tall and very wide, it
really gives off that mean stance just like any antagonistic MS in the Gundam
Universe. One thing that made me fall in love with this kit are the abundance
in details; I always have to outline armour parts that lacked in detail as I
feel that leaving it alone makes the kit look very generic and unappealing. As
mentioned earlier, seam lines plays a very big part in customisation and I can
honestly say that I cannot find any noticeable seam lines on this kit. Bandai
was very cleaver to incorporate the seam lines as being part of the kit design indeed.
 |
| How the weapons are mounted |
Another awesome feature is the movability
and the articulation; for a large kit, it can still kneel down, since the torso
unit is quite compact and the waist unit being quite small, the legs and the
arms including the backpack can be moved freely and with ease. The shoulder
joints has near infinite articulation and can be moved forward and all the way
back. The head unit is surprisingly articulate too, it has a 2 point
articulation as the neck mount itself can be moved up and down. As with any
other gunpla kits, there are cons that are quite annoying, on this kit, one
being the right arm where the “Shining Finger” is equipped; as this is very
heavy; you cannot freeze this pointing forward as it will just droop down, this
is pretty annoying as you would want to pose this pointing that awesome weapon
frontwards. Though this is clearly a minus on this kit, this can be easily
remedied by adding additional plating, putty or simply applying thick paint on
the said shoulder joint. This is understandable though since the main feature
of this kit is the parts separation system where every single unit is a deadly
weapon; that’s why I said before that this Gundam does not require hand held weapons.
Whilst other hero suits gets dragoons and funnels, this gives you limbs; that
to me is an awesome yet very crazy conceptual design; definitely adds to the “unique”
factor of this MS.
 |
| Pretty cool arsenal |
So, on to evaluating this kit; I can
honestly say that I really enjoyed building it; it was yet again a breath of
fresh air as this is definitely not your conventional master grade. The way you
have to assemble it and the way it was engineered, it is astoundingly fun,
giving you a fair amount of challenge and a new build experience at the same time. I will
eventually customise this kit but since I have quite a few on-going projects,
this will have to be parked for now.
Scores
Design
– 7/10 Very Unique and I guarantee that this will
grow on any modeler hoping to acquire a new challenge.
Build
– 8/10 Mainly because of its asymmetrical design,
but although it looks complex, it was surprisingly easy to build.
Details
– 7/10 As stated earlier, this kit does not lack
in details, love the stock lines and the added armour protrusions; the
overlapping armour design is unique to this uniquely designed MS.
Articulation
– 7/10 For a large kit, it is surprisingly
articulate.


0 comments:
Post a Comment